")

Night Photography 101: Gear, Techniques, and Tips
A Beginner’s Guide to Star and Night Sky Photography
By Kae-Lin Wang
I’ve been photographing for over 20 years, from disposable cameras to plastic lomo cameras and 35mm SLR, to digital and DSLR, now back to film, but I didn’t get into night photography until a few years ago when I combined backpacking and shooting night skies. When I was starting out, I did extensive research with lots of trial and error, so I hope these tips for night photography gear and techniques (plus lots of examples!) will help you play with your settings as you learn how to capture the night sky on your overnighters and other dark-sky adventures.
I love the thrill of getting out of my tent in the middle of the night and seeing the stars so bright and being able to capture it with my camera, and I hope you will too. Here’s my best advice for starting out:
Trial & Error and Learning From Others
I find that it’s really important to learn and teach from other photographers—it’s the only way we will ever grow in our field and master our craft. On top of that, the most important thing in mastering night photography is just practicing. Lots of trial and error and getting out there to shoot over and over again.
First and foremost, I learned everything I know about night photography from Paul Zizka. He lives in Banff, Alberta (Canada) with his family and basically shoots everything there (or elsewhere in the most remote and darkest places of the world).
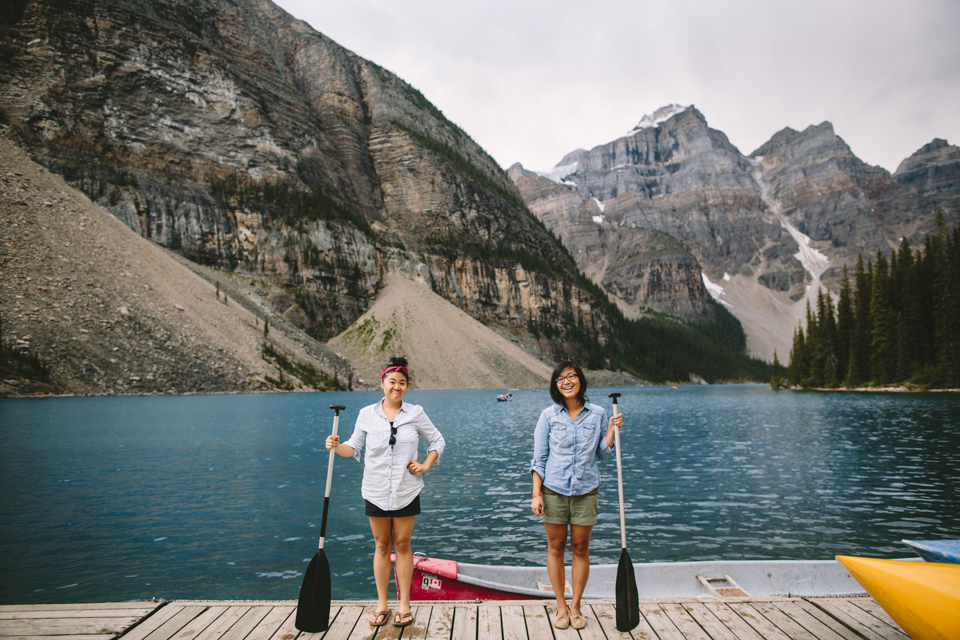
I was drawn to all of his beautiful mountain and Aurora Borealis photos and would look through his portfolio for hours. In 2013, I was clicking around his website and saw that he was offering a workshop in Banff. I immediately texted my friend Jenny and told her we had to do it. Another friend, Dorothy, had always wanted to go there as well, so the three of us decided we were going to make it happen. I emailed Paul and the next thing we know, J, D and I were booked to take his workshop up in Banff!
My dreams were finally coming true and becoming a reality. I can’t emphasize how much you can learn at a workshop. There is nothing like watching someone you look up to do what they love first hand, and actually practicing the techniques and skills in the field. Best of all, it’s with people who are just as passionate as you are, it’s SO much fun and an experience you will never forget.
Night Photography Gear
Gear does play a big part in photography, but you don’t really need anything specific. Here are the basics that I’ve had good luck with:
1. Camera
Any SLR full-frame camera will work when paired with a wide lens that stops at least to 2.8. I started with a Nikon D800 body, I think it’s discontinued but they have a new D810 now. I chose Nikon because I have been used to it for so many years and understand their system.
2. Wide lens
Never cheap out on a lens. Good glass is worth the investment and will make all the difference in the focus and clarity of your photography. 24mm is wide enough on a full frame and works just fine. I opted for a Nikon 24mm 1.4.
After shooting with the 24mm for a while I wanted something wider. I wanted more sky so I looked into a lens that was wider but also two in one. As much as I hate zoomies (primes forever), I didn’t want to lug around two lenses every time I went out overnight so I went with a NIkon 17-35mm 2.8. I do have to shoot at a higher ISO than my 24mm but the wide angle is just so good, no distortion.
3. Tripod
Always get a tripod with a ball head and don’t settle for anything else. I started with the fairly basic MeFOTO Roadtrip tripod before I started backpacking. It’s 3.6 lbs and perfect if you have a car to drive to your location.
For something more backpack-friendly I swapped for the smaller JOBY GorillaPod SLR Zoom. Let me just say, this tripod is fine and gets the job done. Yes, I have to basically lay on the ground and shoot from my stomach but hey, it works.
4. Shutter Remote
This is totally optional, but if you’re worried about blurring images by manually starting or stopping a long exposure, using a shutter remote can be really helpful.
Some DSLRs have bluetooth and mobile apps so you can use your phone as a remote, but if you don’t have bluetooth or don’t want to rely on your phone battery in the wilderness, a remote like this Basic Shutter Release is a perfect simple option.
Night Photography Techniques
- Use infinity focus. The basics of night photography is just figuring out technique and focusing. You want to set your camera on infinity focus. You MUST line that line up perfectly with the infinity mark to be in focus, set it to manual and don’t move it. All of your stars in the sky will be focused, and that’s it. There are other ways to focus if you have subjects, but that’s the main rule of thumb.

- Shoot as wide as possible. You usually have to because it’s so dark out. The widest I’ll ever go (and can) is 2.8, and I typically will always leave the shutter open for 30 seconds. I like it longer so that my ISO can be lower. Usually, that can be anywhere from 400-6400, it just depends if the moon is out or if you have light in other areas.
- Compose your shot. In the most basic way make sure it’s straight, and that you’re capturing whatever other elements you’d like to have in the frame: the mountains, silhouetted trees, your tent, etc.
- Shoot in RAW. It really makes a huge difference in quality and adjustment in the end when you’re back home and editing images.
Pre-Shooting homework
Before I head out on overnighter, I usually do a certain amount of research so I’m prepared ahead of time with notes. This is especially important since you’ll likely be somewhere remote without cell service to look up things while shooting.
Research your location.
You want to choose any area without light pollution, though some glow from afar can look really pretty. Other good things to know about are whether or not a northern lights show might be possible, and the weather forecast.
Look up moon and sun times to plan exposure times.
Before I head out on an overnighter, I usually look up all my moon and sun times here and write them down on a sheet of paper. It’s just good to know around what time the sun/moon will be rising. Sometimes if I plan on taking intervals, I’ll google some websites and write down some exposure times to practice with.
Heavy Packs and Middle-of-the-Night Alarms
So in order to get to these really beautiful remote locations with all their dark sky glory, you’ll need to hike out with all of your heavy camera gear. It’s always worth it in the end: The higher you climb, the better the stars, the better the peaks.
The hardest part will always be having to crawl out of your tent in the middle of night, especially in 12-degree weather. Pack extra layers for when you come out bc you’ll be frozen while you’re idling when you shoot, so it gets cold fast.
I set an alarm for every 2 hours usually from 11pm-4am to get up, depending on what the sky is doing. I like to shoot before and after the moon comes out. That’s why it’s nice to have the times on hand so I know when to come out or not.
Sometimes if it’s overcast, I will just peek outside and see if there are any stars. If not, I’ll let out a sigh of relief and go back to my warm sleeping bag. And if the sky is unpredictable, sometimes I’ll go set up my tripod somewhere and set intervals for throughout the night and hope at least something comes up. I’ll check it in the morning, hoping the wind/some animal didn’t knock it over, but the lens is usually fogged up most of the night.

Me shooting in Banff lit by moonlight. This is basically what night shooting is like: waiting around for your camera to take pics while you sit in a million layers (not very glamorous). Photo by Jenny.
Returning Home & Post-Processing
My favorite part is coming home and loading all the photos on my computer. There’s so much to see and bring back once you’re at the screen. I love how every trip is always a surprise, you literally never know what you’re going to get that night! So much fun.
I believe post-processing plays a huge part in photography, but I didn’t learn how to edit until I was in college because that was the standard for getting photos compatible with print. I truthfully never liked editing and felt it was hard to keep up with the new technology, but know now it’s so worth it to learn some basics because it makes a world of difference in making night photography shine.
For software, I edit all my raw images in Lightroom. For presets, I use a combination of VSCO and Priime. I also believe creating a style of your own that portrays your personality is important. Who cares if someone else doesn’t like it, as long as you think it looks good in your eyes, it’s all that matters. Editing night skies is fun because you can adjust colors too.
Examples with location and shooting data:
I think it’s really hard to learn how to do these things without going out and trying it out over and over again until you get the hang of it, but I wanted to share some images and their data—with variation to showcase different exposures.

Paul in Two Jack Lake in Banff, AB. Nikon D800, 24mm, f/2.2, 10 sec, ISO 1600

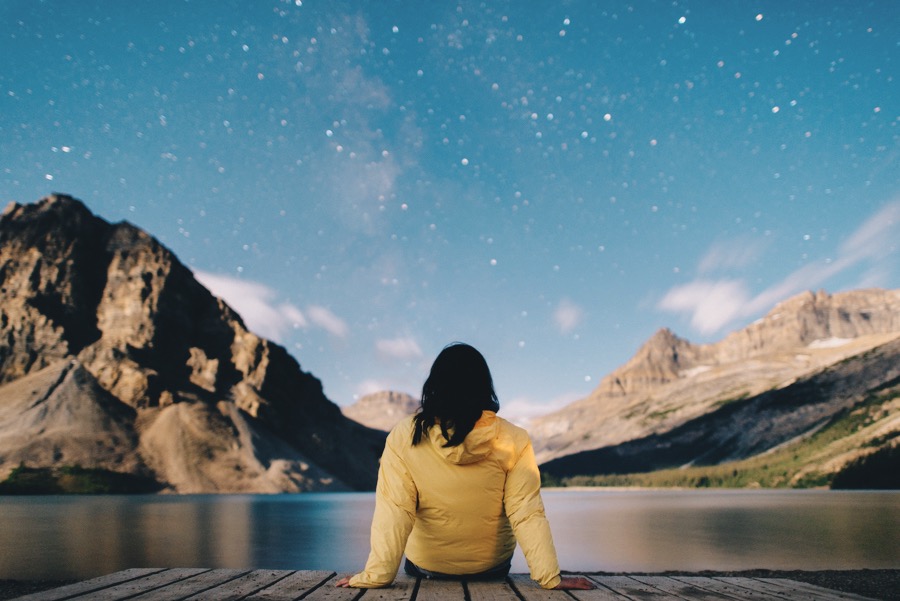
Dorothy at Bow Lake in Banff, AB. Nikon D800, 24mm, f/1.4, 30 sec, ISO 800

Gothic Basin. Nikon D800, 24mm, f/2.8, 30 sec, ISO 400

The Enchantments. Nikon D800, 17mm, f/2.8, 30 sec, ISO 3200

Blanca Lake. Nikon D800, 85mm, f/8, 9 min, ISO 800

Camp Muir at Mount Rainier. Nikon D800, 17mm, f/2.8, 30 sec, ISO 3200

Artist Point at Mount Baker. Nikon D800, 17mm, f/2.8, 30 sec, ISO 1600

Paradise at Mount Rainier. Canon EOS M, 22mm, f/2, 30 sec, ISO 800

Paradise at Mount Rainier. Canon EOS M, 22mm, f/2, 30 sec, ISO 800
Takeaways
Night photography is one of those things you have to learn by doing, but I hope that with these basics you feel better equipped to get outside and try it out! There is so much more detail and specs to get into, but experimentation and practice are really vital in improving your night photography. Have fun out there!
Editor’s Note: This post contains affiliate links, which help to cover the expenses of maintaining She Explores at no cost to you. Thanks for your support! Any purchase you happen to make helps us stay online & creating more resources like this one.
- About the Author
- Latest Posts

Kae-Lin Wang (she/her) currently resides in Seattle, WA and identifies as an Asian-American woman with a background in thru-hiking, mountaineering and cycling. She recently started reclaiming her racial identity and is passionate about connecting cyclists who identify as AAPI (Asian-American & Pacific Islander) to form a safe, healing community space through Asian Bike Club. She has 20 years experience in photography and recently has been dabbling 35mm film again, documenting personal experiences and details that may be quickly missed. Find more of her work on her website.

Be the first to comment